 |
| Image Before and After Editing |
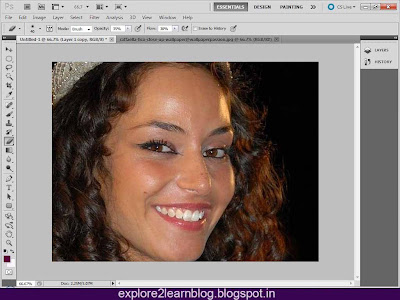
Today, I will show some interesting creativity with Photoshop. We will learn how to make a skin grow like we have seen the actress skin, with the help of Photoshop. After learning from this tutorial you will able to edit any type of skin (spots, dull,dark circles,imperfection etc.)
Follow the given steps to learn skin's editing :
1. Open the photo which you want to edit in new page with good resolution.
 |
| Original Image |
2. Make duplicate layer of the photo.
3. Select the blur tool with strength of 50% and blur the image little bit.
 |
| Image after Blur effect |
4. Select the clone tool (S) with opacity and flow of 55% and do the cloning to the skin in the photo.
5. Again, blur the image with blur tool with the 40% strength.
6. Now select the quick selection tool (W) and select the skin .
 |
| Selection using Quick selection tool |
7. Open the curve (crlt+M) and give fairness touch to the photo with the use of curve.
 |
| Glow with Curve Tool |
8. Select the eraser tool (E) with opacity and flow of 60% and erase the corners of the photo to look real.
Now, you have Final edited image below.
 |
| Final Image |
Point to be remember during the editing...
1) Do not blur the image to much in step 3&5. It will look artificial.
2) Do not give much light expose to the photo in step 7. It will make image dull.
I think you have enjoyed reading this tutorial. CLICK HERE to see more Photoshop tutorial.
No comments:
Post a Comment